-
-
October 14, 2020 at 9:22 pm #301249
Courtney Major
ParticipantHello all,
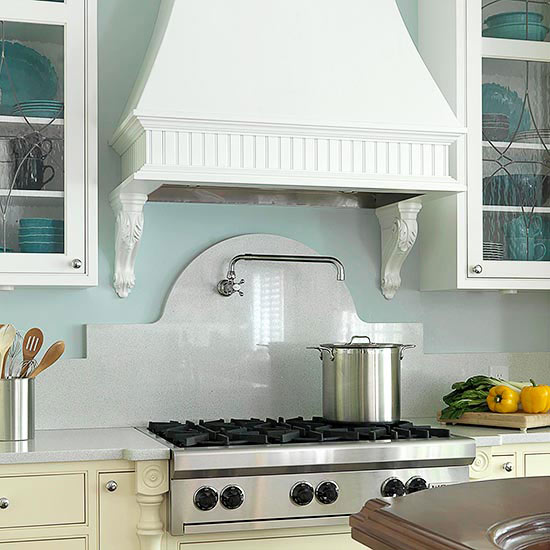
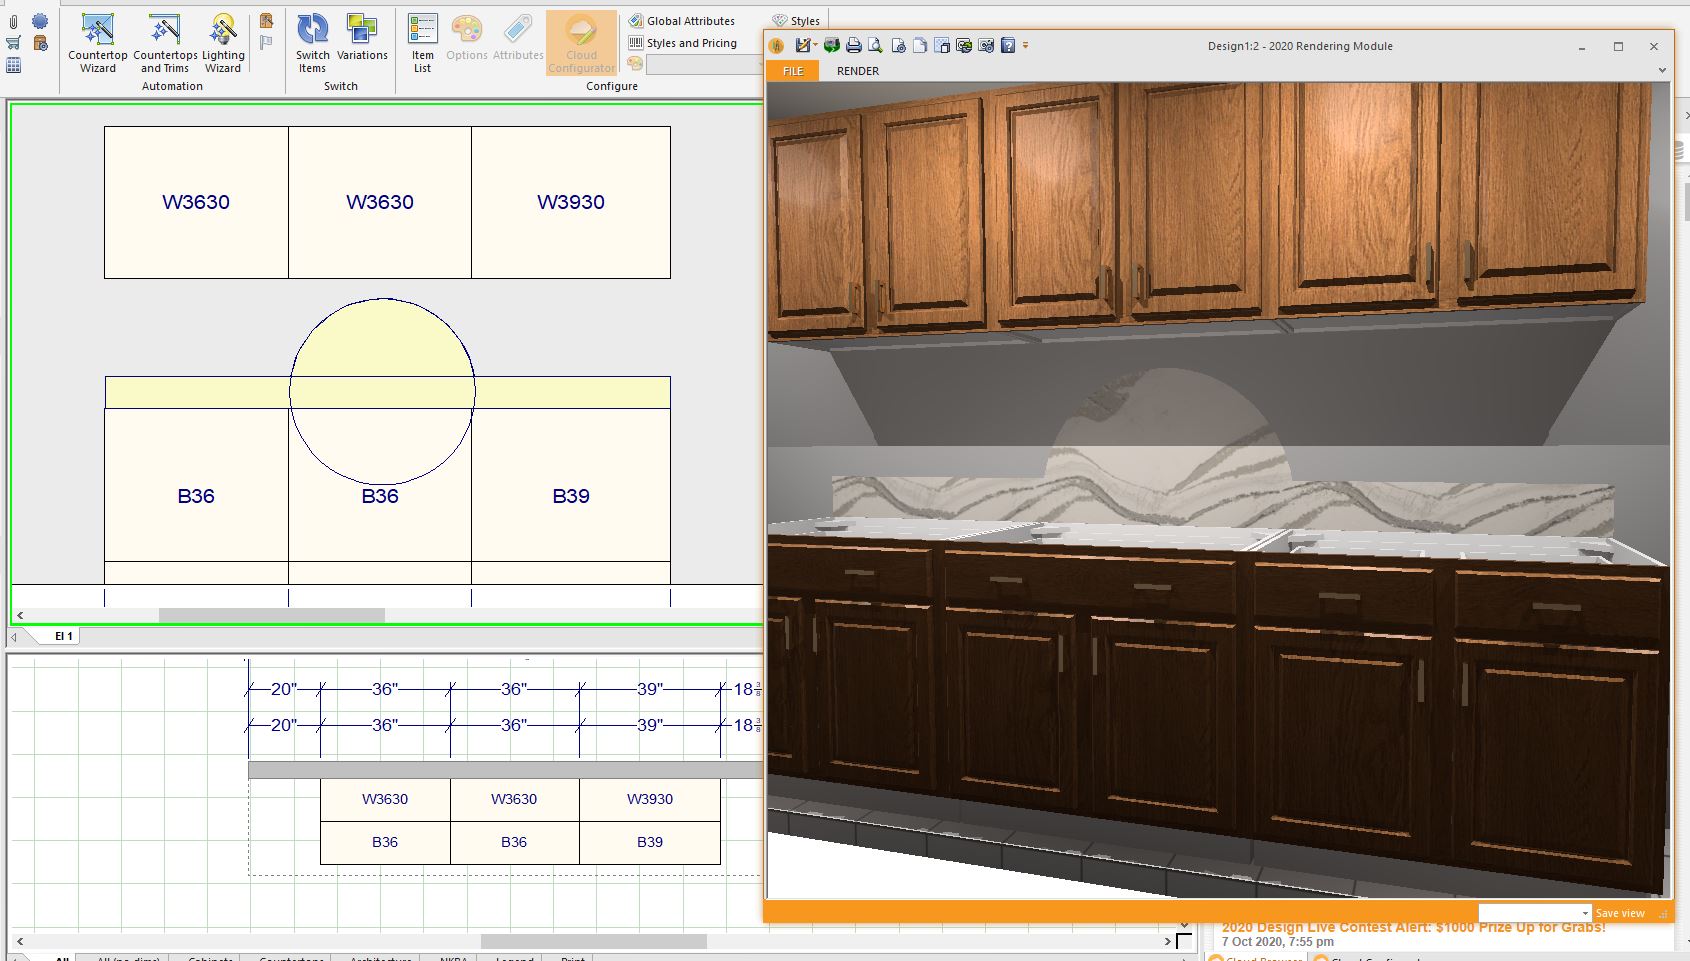
I am trying to create a shaped backsplash similar to the one in the attached image. I’ve been trying to do this with a surface, but I cannot figure out how to create curved lines this way short of freehanding it. What am I missing? Surely there must be a way to create curved lines on a surface in elevation? If not, does anyone have any tips on how I might create a shaped backsplash like this? Thanks in advance!
Attachments:
-
October 15, 2020 at 11:34 am #301344
Kristopher Papaleo
ParticipantHi Courtney,
The only way to create such a shape in the elevations is if you were to freehand it. There is an ‘easier’ way to freehand it however.
In Design, you can go to your Annotations tab and use a Rectangle for your backsplashes base. Then you can use either the Circle or Elliptical Arc for curve of your backsplash.
When doing this, make sure to turn off the Item Snap and the Ortho tool. This will ensure that you can create as many points as needed to make your shape.
Hope this helps out a bit!
Kris
-
October 31, 2020 at 7:11 pm #303889
 Ariana ThompsonParticipant
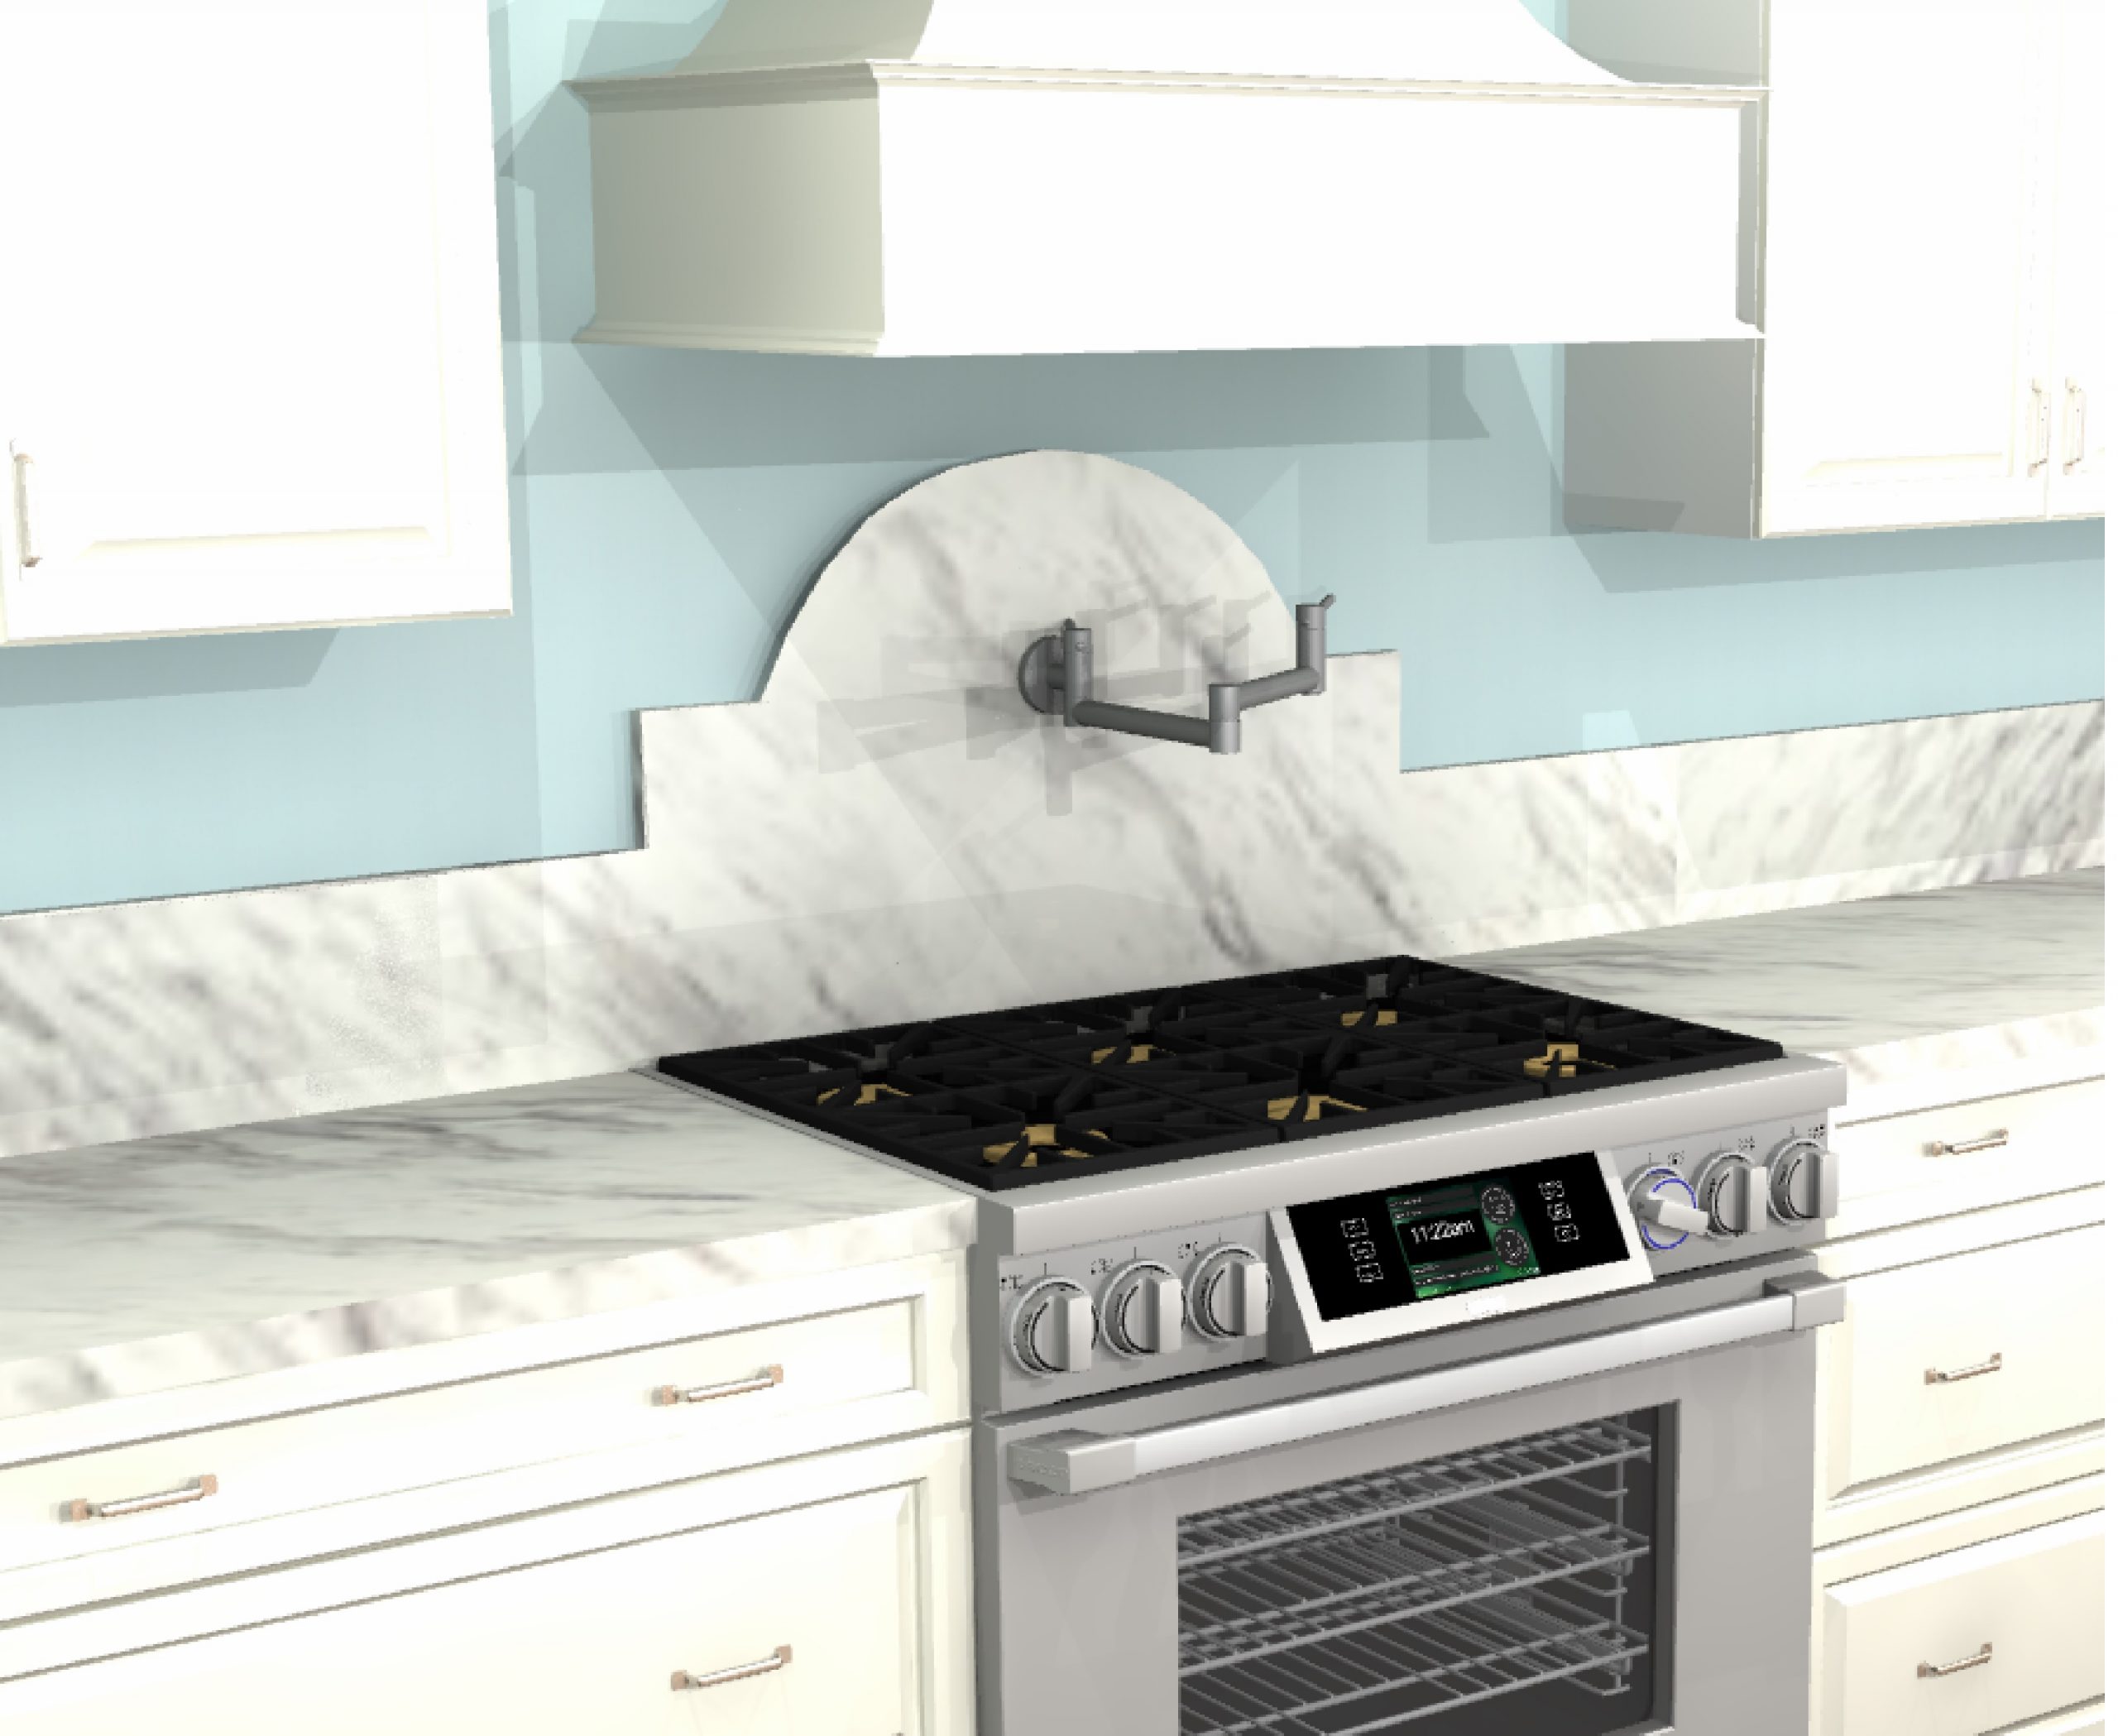
Okay – as soon as I saw this – I NEEDED to try it!
So – SUPER fast – using just Common textures – but it worked!
Ariana
Attachments:
-
November 5, 2020 at 6:36 am #304410
de VOLONTAT
ParticipantHi Chris,
I made a lot of objects this way, but flat.In elevation, I don’t see how to do it.Can you give more details
-
November 5, 2020 at 11:25 am #304414Participant
Hi De Volontat,
Here are the steps I took to create this backsplash.
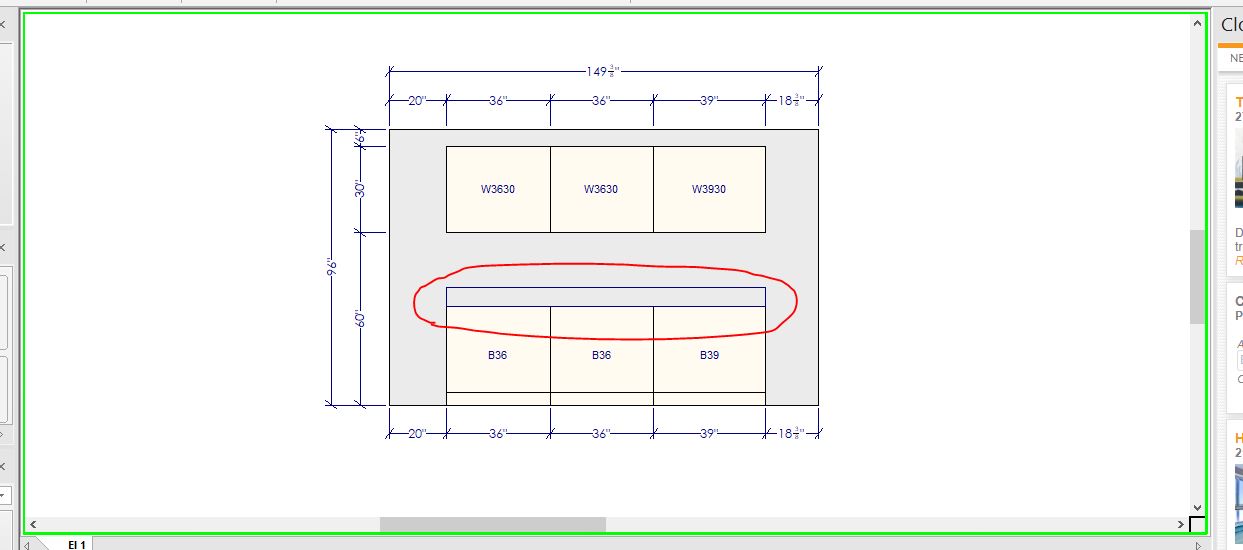
Step one: Create an elevation of the wall you wish to add the backsplash to.
Step two: Using Annotations – Rectangle, draw the base of the backsplash. -See image one
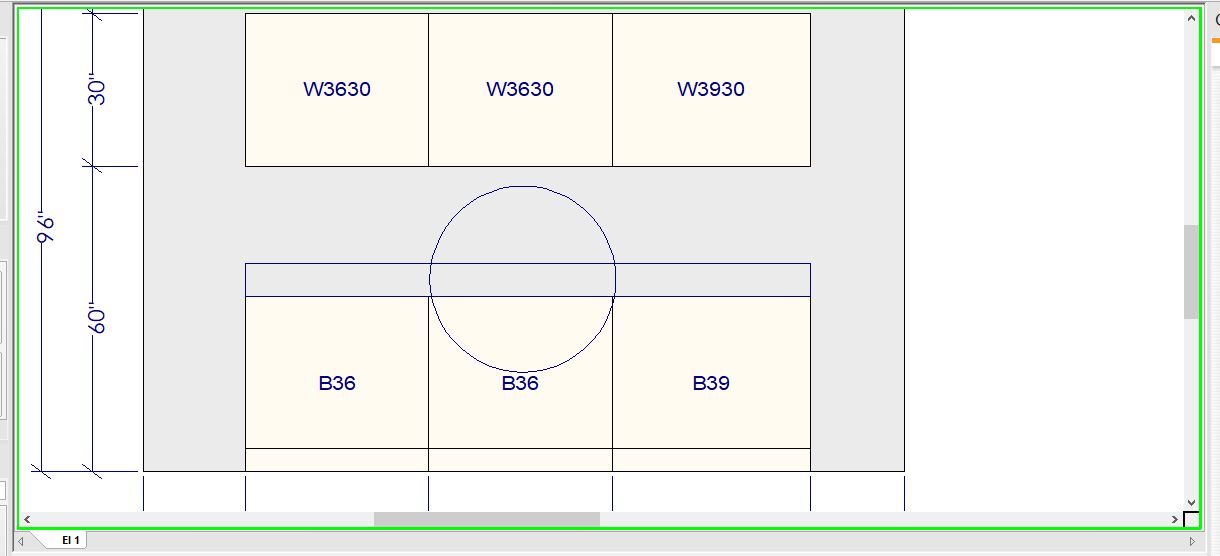
Step three: Using Annotations – Circle, make the rounded top of the backsplash. -See image two
Step four: Now that you have made the basic shape of the backsplash, turn off “Ortho” in the bottom right toolbar and now trace over the shape you made using the Surface tool from the Items tab.
-See image three for final product.
I hope this explanation was helpful. 🙂
Regards,
Kris
-
November 5, 2020 at 11:43 am #304444Participant
Thanks a lot Kris !
Your explanations are perfect.
the thing I didn’t understand was the use of SURFACE.
I tried to use it like on the floor, making a right click and then convert in 3D.Really wonderfull.
Thx again !!! -
November 5, 2020 at 1:03 pm #304447Participant
Just a question Chris.
How do you change the Depth ?
-
November 5, 2020 at 1:37 pm #304448Participant
Hi De Volontat,
The surface cannot have its depth changed. It will always remain at 0″.
Regards,
Kris
-
November 5, 2020 at 1:42 pm #304449Ariana ThompsonParticipant
Hi De Volontat,
I gave mine depth by creating the shapes using cubes and the circle – at 3/4″thick – then when I created the Surface, I pulled it in/out from the wall to be in front of them. So the thickness you see in my render is the custom shapes behind the surface.
Ariana
-
November 6, 2020 at 4:47 am #304482Participant
Thanks a lot you two
-
June 26, 2024 at 7:16 am #438847
ivy michael
ParticipantWhen editing surfaces in elevation, it’s essential to maintain accuracy and detail to ensure a realistic representation. Utilizing advanced tools and techniques allows ghost mannequin photo editing for precise adjustments and enhancements. This careful attention to detail can significantly improve the final output, making it more visually appealing and technically sound.
-
You must be logged in to reply to this topic.