-
-
March 26, 2021 at 10:23 am #321306
Jeremy Pyatt
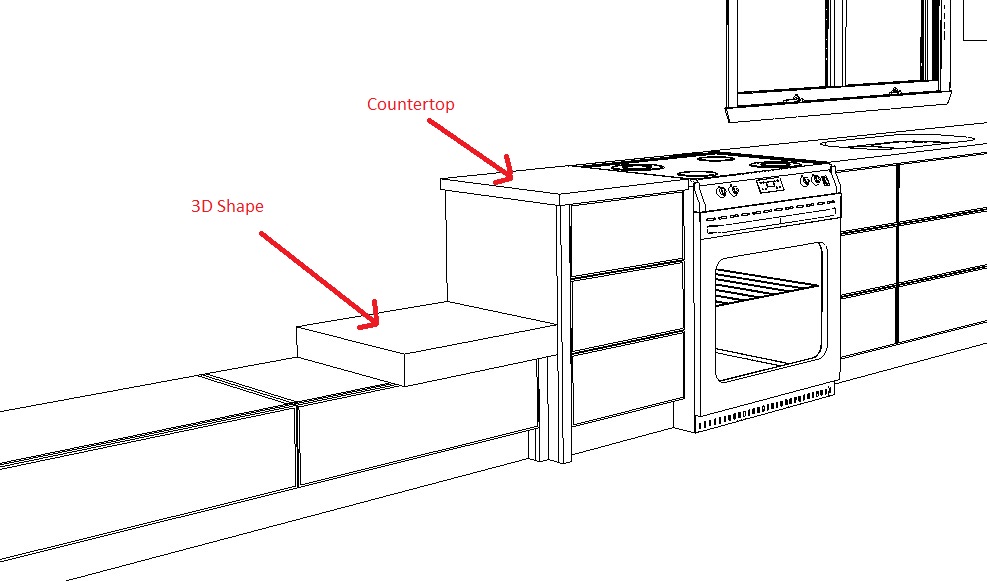
ParticipantCan anyone tell me why when I place a 3D it shows as colliding with countertops or other 3D objects? Please see attached. The 3D object is below the countertop, yet it shows a collision.
Thanks
Attachments:
-
March 26, 2021 at 11:08 am #321325
 Erik TornquistParticipant
Ooo man! I’d love to know the answer as well. Have dealt with that so often, I’ve just gotten so used to it. Figured I was doing something wrong.
-
March 26, 2021 at 11:18 am #321326
Kristopher Papaleo
ParticipantHi Jeremy,
The issue you are experiencing is a bug in the program. The 3D Shape will show a collision if it is placed underneath a countertop. We have recorded the issue and are working to have it resolved.
A workaround to removing the collision pattern would be to Right click on your floor plan and go to ‘Display Settings’. From there, you want to go to ‘Warning Patterns’ and uncheck the box for ‘Colliding Items Pattern’. You can repeat the steps for your elevations as well. Only do this once you have completed your design so that you know nothing is colliding.
Regards,
Kris
-
March 26, 2021 at 2:04 pm #321328Erik TornquistParticipant
Yeah that’s what I do a some times, Jeremy. I’d recommend it for the time being. Personally, I’ll leave the warning on until the end of the design, make sure the warnings aren’t warranted, then shut them off in the display settings.
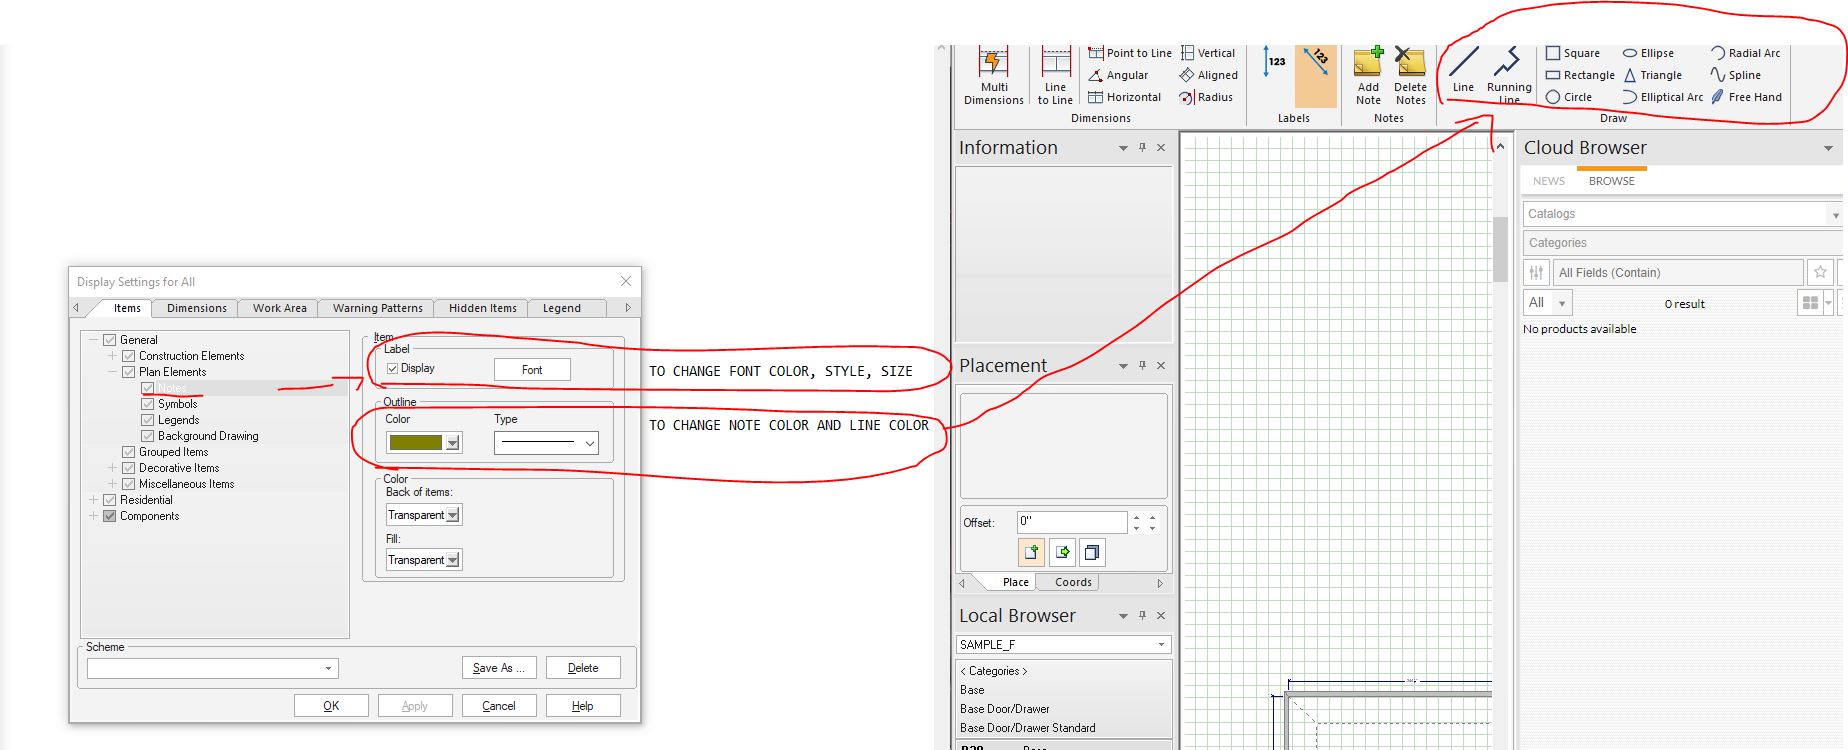
Hey Kris, is there a way to change the default font settings for annotations/measurements/ etc…?
-
-
March 26, 2021 at 3:14 pm #321386Participant
Hi Erik,
There is a way to change the font size and color for annotations (user dimensions, line tool, and the shapes). You can also change the color of the auto dimensions as well.
To change the default font and color for your notes, go to Display Settings by right clicking the floor plan. Then from the Items tab, expand ‘General’, expand ‘Plan Elements’ and select ‘Notes’. Once you select notes, click on Font on the right side of the window and that will open a smaller window which will allow you to change the font, font style, size, and color. To change the color of the ‘Line, Running Line, square, rectangle, circle. etc.. you will follow the same sets above, except when you go to ‘Notes’, you will change the color on the right under ‘Outline’. – See attached image
To change the color of the User Dimensions, you will go back to the Display Settings, then switch tab to ‘Dimensions’. From here you can change the color shown next to ‘Font’ (this will change the color of the line that the dimension sits on). Then click ‘Font’ to change the dimension font, size and color. Changing the color of the auto dimension would be the same steps.
Hope this helps!
Kris
Attachments:
-
March 26, 2021 at 4:15 pm #321406Erik TornquistParticipant
Of course this helps! And that’s why we love you.
-

You must be logged in to reply to this topic.