-
-
June 20, 2018 at 6:13 am #192308
 RichardParticipant
Hi guys.
I get a lot of phone calls from designers all over the country asking for help, as I used to do Fusion training in a previous life. So, with this in mind, I like to add some hints and tips to the Fusion forum, so that the most commonly asked questions will hopefully be covered.
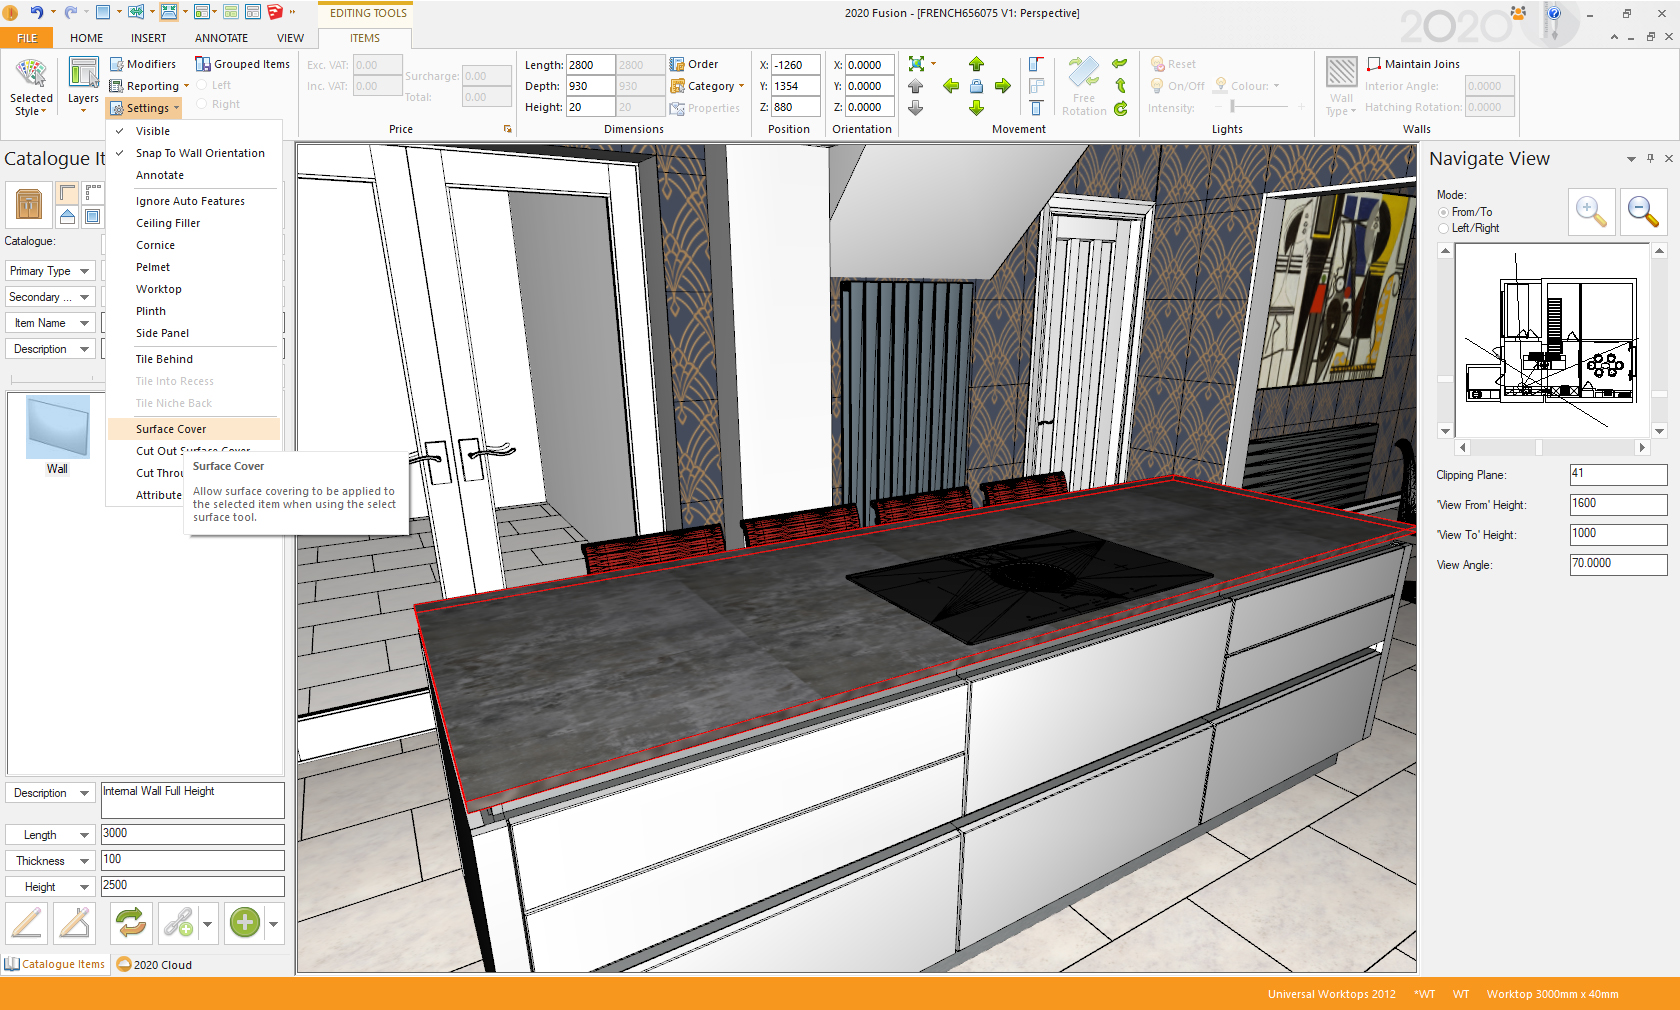
My next topic that I receive quite a lot of phone calls about, is how to design kitchens with supplier specific work surfaces, for example Silestone, Dekton, Caesarstone, or NeoLith etc. And to draw them so they look right, especially on materials with very specific patterning, like veins etc.
For my work surfaces I always use the ‘Universal worktops’ catalogue, and in order to draw the patterns accurately in my designs, I use ‘Surface coverings’ instead of the standard colour change option, as using the Simple ‘Colour change’ option often creates an undesirable tiled pattern, making it look like there are joins all along the work surface.
Using surface coverings gives me full control over how the pattern sits on the work surface, including the orientation, and most importantly, the size of the pattern is accurate.
As an example, to add Dekton ‘Orix’ to a design, follow these steps:
1. Go to your work surface manufacturer website, or contact them and request or download full slab images, and save them into your ‘Surface covering material’ folder in your Fusion files.
2. Select the work surface piece you want to add the material to. Go to ‘Items’ – ‘Settings’ – click ‘Surface Cover’. This will allow you to add surface covering to your material.
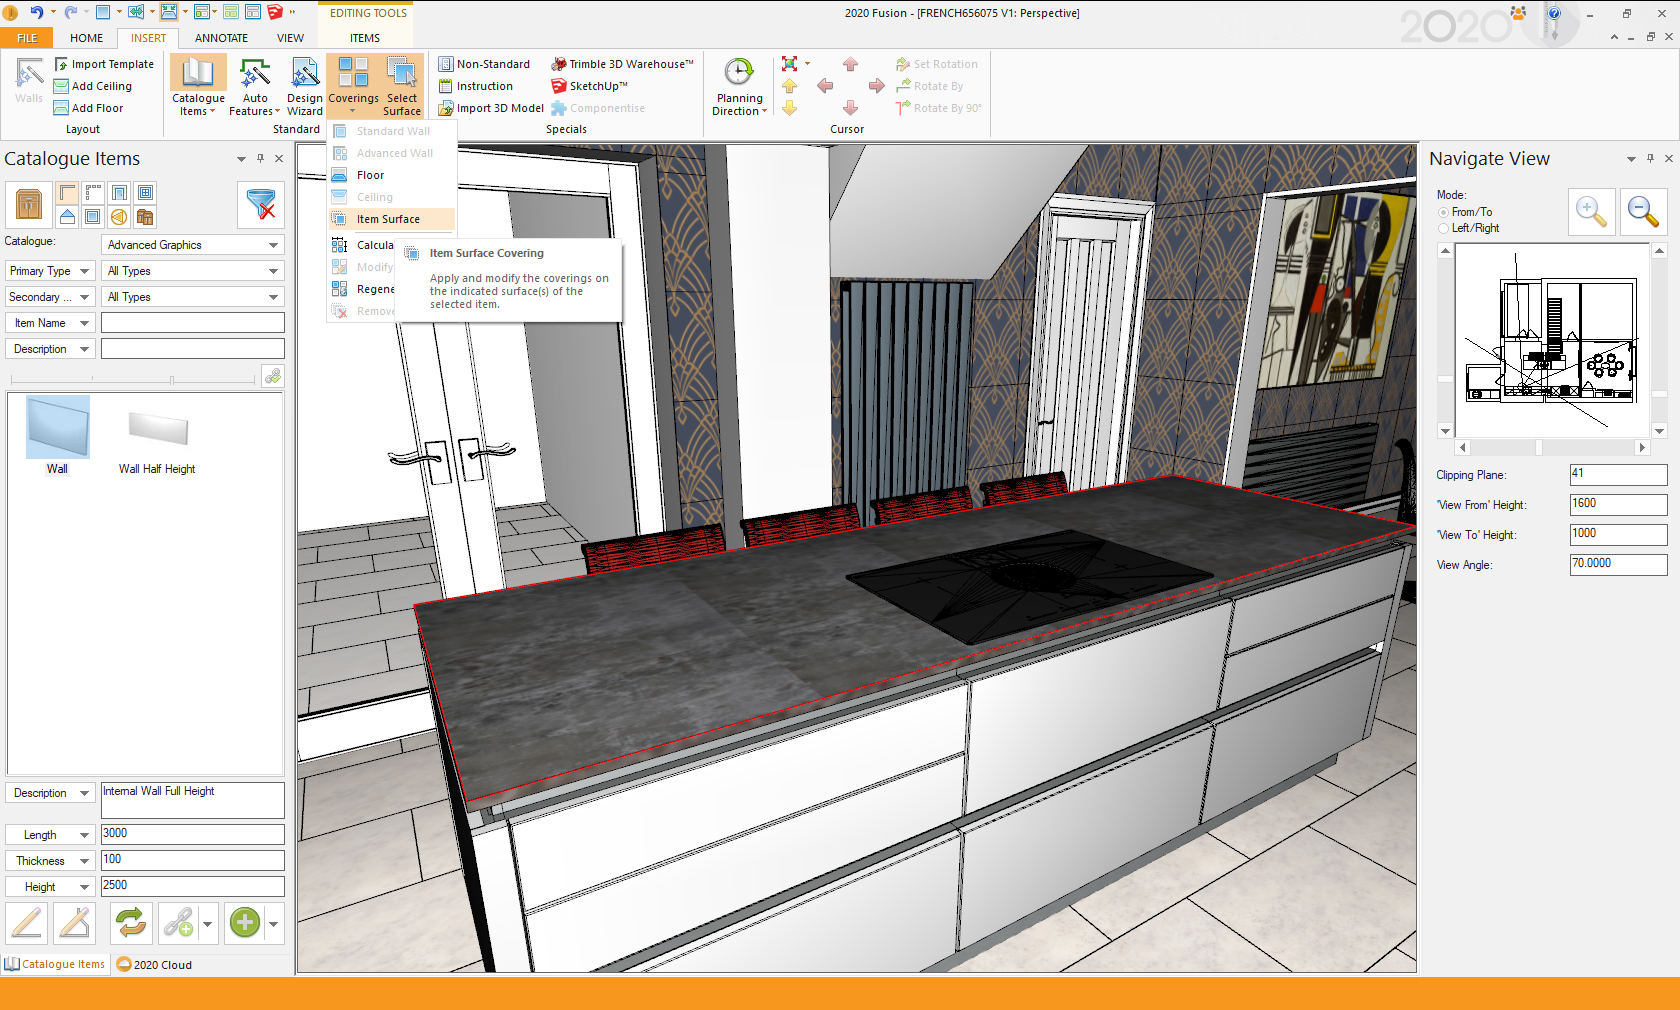
3. Go to ‘Insert’ – click ‘Select surface’, and in your design window, click on the surface you wish to cover.
4. Still on the ‘Insert’ tab – click ‘Coverings’ – ‘Item Surface’
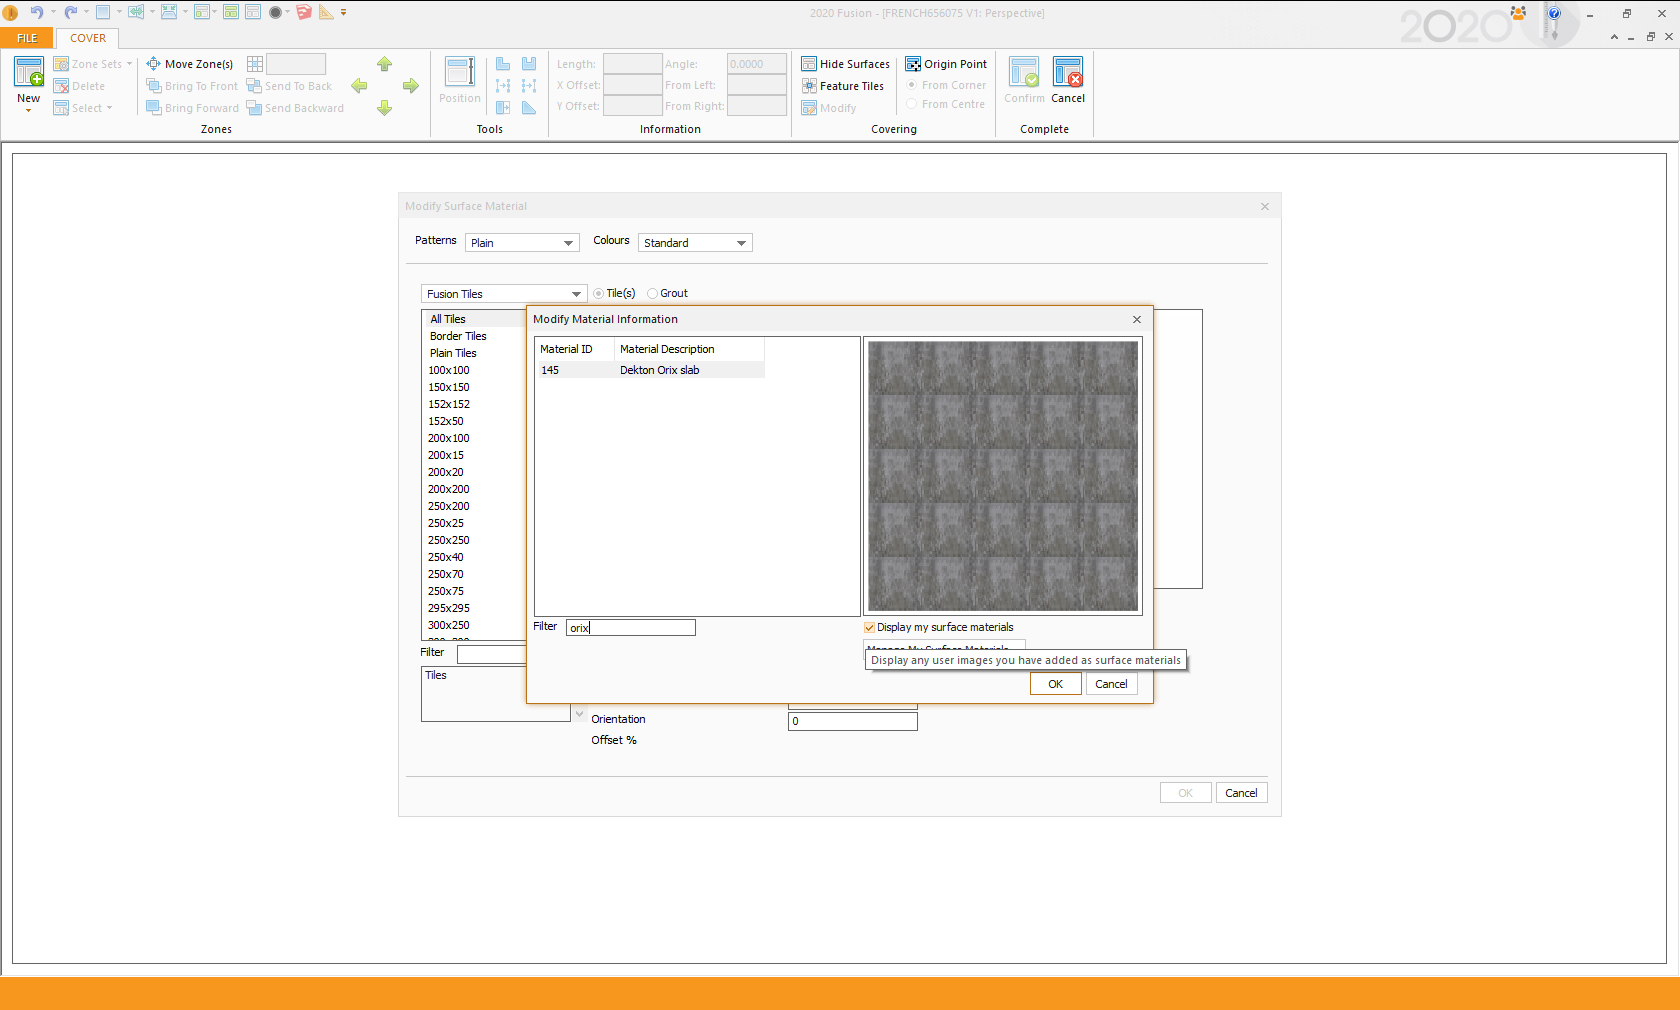
5. A wizard will open. Select ‘Fusion Tiles’ in the catalogue option. Enter the size of the supplier slab accurately NOT the size of your work surface piece. (Dekton is 3240 x 1472mm) Click ‘Add’.
6. On the material window that opens, click the ‘Display my surface materials’ box. Then scroll through or search for your colour by name. Click ‘OK’ and the wizard will then show your material as a tile.
7. Remove the ‘Grout’ line by clicking the ‘Grout’ tab, and entering ‘0’ in the thickness boxes. Click ‘OK’. This will then show you a preview of the material on your work surface piece.
8. To change which part of the slab is displayed on your work surface piece, click the ‘Origin point’ control in the top menu bar, and position the cursor in any of the corners to preview different parts of the slab on your work surface. Click ‘Confirm’ to apply this to your design.
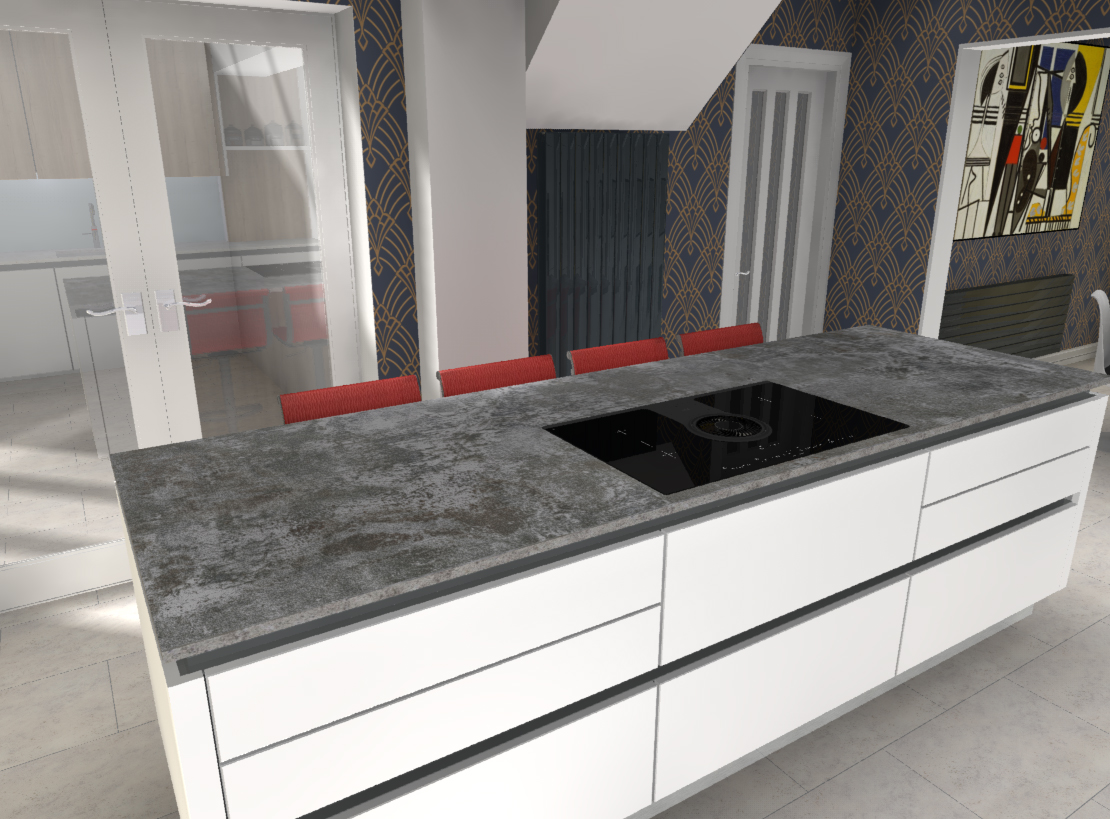
9. On my design shown here, as Dekton has a different edge finish to the surface finish, I have simply used ‘Colour change’ and changed the edge colour to a custom colour that matches the Orix edge. (Custom colours is another topic I have covered previously)
-
September 6, 2018 at 10:43 am #202371
Grant Hughes
ParticipantAs an add on-
I’ve been doing my worktops this way for a while, if you use advanced graphics or another non tile catalogue when you hit the surface editor you don’t need to change the grout thickness to 0 as there is none.
If you want to position a vein exactly on the slab, you can select origin point and move it around to re position the texture.
Surface covering does not like cutouts! If you are going to use this around a sink, turn cuts through worktop and surface off. Then split your worktop into quadrangle blocks and apply each texture separately. The uv mapping gets messed up sometimes when you try to this method with cut through.
Equally though keep an eye out for new worktop catalogues in V6 as the textures are starting to come in full size 😀
You must be logged in to reply to this topic.