-
Importing an AutoCAD .DWG file into Giza can be a great time saver by allowing you to import an already created architectural floor plan, however not all DWG files are created equal and some can be just plain problematic for Giza. Here are the top 5 common problems when importing DWG files along with some tips on how to handle them.
1. The Drawing is a Mess
Have you ever imported a DWG file and just got way too much information? Many DWG files we see contain not only the floor plan, but also ceiling grids, electrical plans, plumbing layouts, etc. This can really clutter the drawing making it difficult to plan the furniture. When Importing the DWG you have the option of importing All Layers or only Active Layers.
Many times the architect who created the drawing might have turned off these layers ahead of time for you. It is worth testing if importing using Active Layers will result in a cleaner looking drawing. This setting will only import layers which are ON in the DWG and will ignore any layers turned OFF. This will give you the flexibility to ask the person who is sending you the DWG file to turn off those extra layers you don’t need. AutoCAD has an additional layer state called Frozen which Giza does not recognize. Many times we see the architect will Freeze layers instead of turning them off. Giza will still import frozen layers so it is best to ask them to also turn off any frozen layers to prevent them from importing into Giza. Keep in mind that you can always turn the layers off once they are imported into Giza. Giza has a layer manager which you can turn off and on layers yourself to clean up the drawing.
2. The scale is wrong
Occasionally you will come across a DWG file that was created in AutoCAD using a different scale or perhaps it might have been drawn using Metric units. After importing a DWG file I recommend taking a measurement of a door opening to make sure the drawing is scaled correctly before placing your furniture. If you measure a door and it reports 3 Inches instead of 3 Feet, then you may need to re-import the drawing using a different scale setting. When importing your DWG file there is a setting to Convert Units From. The Setting of Inch is the default setting and is what you will use for most DWG files. However in some cases you may need to change this to MM or CM if it is a metric drawing, or sometimes to Feet. If changing this setting still does not give you the correct scale, then it will be necessary to manually scale the file in Giza after the import.
3. Things are missing from the drawing
After importing a DWG file you may sometimes find that items such as the doors and walls are missing. There can be a few reasons for this. The most common cause is that some items such as the doors and walls were created in AutoCAD using “AEC” or Architectural Blocks. These are items that Giza cannot import directly. There is an AutoCAD command called EXPLODE which will break down the blocks into more simple elements such as lines, circles, and arcs which Giza can import. If you are missing these items, you should ask the architect who prepared the DWG if they can explode these items before sending you the DWG file. Another reason these items may be missing is if the DWG file is using XREFS. This stands for external reference and is essentially many DWG files linked together. AutoCAD has the ability to open several DWG files and overlay them to make a complete project. So they may put the Walls in one DWG file and the rest of the drawing in another DWG file. Giza does not support this method. The entire drawing must be contained in a single DWG file when importing into Giza. You should ask the person sending you the DWG file if it contains any XREFS. If so, ask the architect to “Bind” or “Insert” all the XREFS into a single DWG file they can send you.
4. The program crashes
Occasionally when importing a DWG file it may cause Giza to completely crash or shut down. This is usually due to an incompatible block or item in the DWG file that Giza is trying to convert to a symbol. On the Giza DWG load option screen there is a setting at the bottom right called “Blocks To”. You have a choice of Elements or Symbols.
When Giza is set to “Symbols” which is the default setting, it scans the drawings for any blocks and tries to convert them to a corresponding Giza symbol or furniture object from a manufacturers catalog. This setting was originally developed to convert the manufacturer symbols from the 2020 CAP Program to Giza. If the DWG file was created in the 2020 CAP Studio program and it contains manufacturer symbols you want to convert to Giza, you should use the Blocks to Symbols setting. However, if the drawing is strictly an architectural floor plan and you will be placing your own furniture symbols then using the Blocks to Elements setting usually will result in a cleaner drawing. This should also prevent the program from crashing if it encounters an object it cannot convert. Even if you do not experience a crash it is worthwhile to import the drawing twice. Once using the Elements setting and once using the Symbols setting and then taking better result.
5. The imported drawing is zoomed out very far
Some drawings after you import them and use the zoom all button will zoom further away instead of filling the screen. This is caused by an object(s) or attribute far away from the main drawing. Deleting these objects from the drawing will then allow you to zoom back to the main file. You can use the Invert Trick to select and delete these items away from the main drawing.
- Draw a selection window around the main drawing to highlight what you wish to keep.
- Once that is selected, go to the Edit menu > Select > and click Invert.
- You will see your drawing deselect, and then Giza will select any other objects that were outside your selection window.
- Now just press the Delete key on your keyboard. Those items away from the drawing should now be deleted.
- Click the zoom all button and see if the drawing now zooms to fill your screen.
Please feel free to share if you find these tips helpful or if you see any other common trouble when importing DWG files into Giza.
Worksheet is full of features that are designed to cut down on the amount time required to finalize a project. Many of us veterans have spent the last two decades perfecting the art of quick worksheet-ing. However, every so often I still catch some people doing things the long way. I wanted to share some brief insight into a few features that may save you some time on a project. A more detailed walkthrough on some of these features is available in the 2020 Worksheet User Guide, but I will try to cover the basic options below.
(1) 2020 Compare
2020 Compare’s key feature is right in the name. This tool allows you to compare two worksheets against each other. This is especially useful for reconfigs as you may compare your old worksheet against the new worksheet with the new modifications. Compare will generate three outputs: a list of new items added, a list of excessive items remaining, and a list of items that are reusable. You may compare any specific field on the worksheets as well. For example, filter by specific part numbers, manufacturer codes, option numbers, or Alias tags. To access this feature in Worksheet, select “Compare” from the Tools menu.
(2) Catalog Date / Catalog Location Fields
Catalog Date and Catalog Location fields can be especially useful when revisiting an old worksheet. From the View menu select Columns then “Customize Columns”. At the bottom of the list of columns you should find “Catalog Date” and “Catalog Location” that you may enable. Catalog Date will show you the date of 2020 catalog file at the time an item was placed. This may be helpful to determine when you placed and item on a worksheet. Note that this is different than the manufacturer Price Effective dates, as it only relates to the version of the 2020 catalog. It may be helpful to think of “Catalog Date” as a version number of the catalog from where the item originated. On that same note “Catalog Location” will show you where the item was located in the catalog. Note that this may change if a manufacturer choose to reorganize their catalog hierarchy in a future update.
(3) Assign
The Assign feature allows you to mass assign a worksheet field a specific value. You may access this tool by selecting “Assign” from the Edit menu. Assign is a straightforward tool where you check the column to edit, enter the value you would like to be in that column and click OK. If you only need to do this for a few items you may check the “Assign only to select items” box.
(4) Price Adjustments
I often catch people inserting a blank “Item” in a worksheet and typing a fixed cost description into the “Part Description” field. Price Adjustments are another way to add fixed costs like “Freight” and a superior way to add calculated costs like “Sales Tax”. From the Item menu select Insert and then “Price Adjustment”. In the description field enter the name of the adjustment. Then select the type of adjustment, whether it is a “Fixed-Amount” or a “Percent”. On the Next screen you will be able to select whether this is a charge or a credit. The adjustment will appear at the bottom of your worksheet.
(5) Option Clipboard
Global Options can be a great way to option large projects in a quick manner, but what if you want to target a few items and precisely copy options from one to the next? The Option Clipboard works similar to the clipboard in Microsoft Word. From the View menu select “Task Pane” and then “Option Clipboard”. The Clipboard should appear on the right side of the Worksheet window (by default). Select a fully optioned item on your worksheet and click the “Copy” button on the Option Clipboard. You should see the item’s options appear on the clipboard. Select another like item on the worksheet and click Paste. You just saved yourself extra clicks optioning that item!
I hope you find these tips helpful!
Can you think of any other features that have saved you time on a project? Please share below.
Topic: Custom Backsplash
I often have a backsplash with more complexity that just standard tile. It will have some sort of design or accent thrown in. I have in the past exported my 2020 drawing to Photoshop and then overlaid the backsplash to give a visual for my customer, but I would like to do this through 2020, so I don’t have to keep doing it for every perspective and so it can be seen in room viewer also. Does anyone have any tips on how to do this?
Watch this short video “2020 Design Tips: Designing with Paint”
Please register here if you haven’t already to access the video.
[eyesonly logged=”out”]Log in to access this content. [/eyesonly]
[eyesonly logged=”in”] What’s hot in the Interior Design industry right now? Paint paint and paint! Watch this short video and learn how to swap out paint colors and use the new Sherwin-Williams paint library in 2020 Design.
[/eyesonly]Industry Trends Report that LED lighting and quartz are in very high demand. Many designers ask me how to activate the Countertop Wizard and Lighting Wizard in their 2020 Design.
Step one is to login onto 2020.net.

Step two is downloading the catalogs to be loaded into your 2020 Design. We recommend that you try the Sensio lighting catalog and the Silestone Quartz catalogs first. Once you load them into your 2020, you can immediately begin wowing your customers with the LED lighting and Quartz that they are clamoring to see.
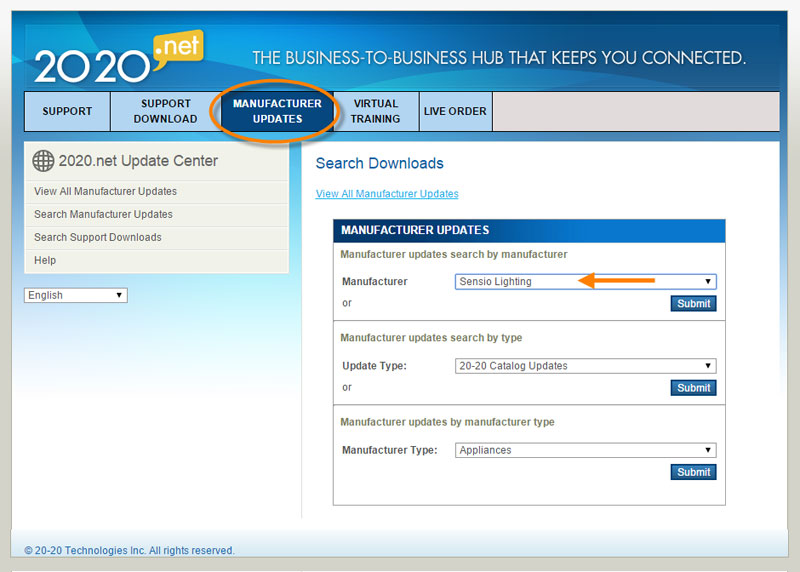
Visit 2020.Net to download these catalogs today.
Not on Support? Contact 2020 Support here to learn more about our services.
2020 Design Tips: Saving time with the Elevation Feature
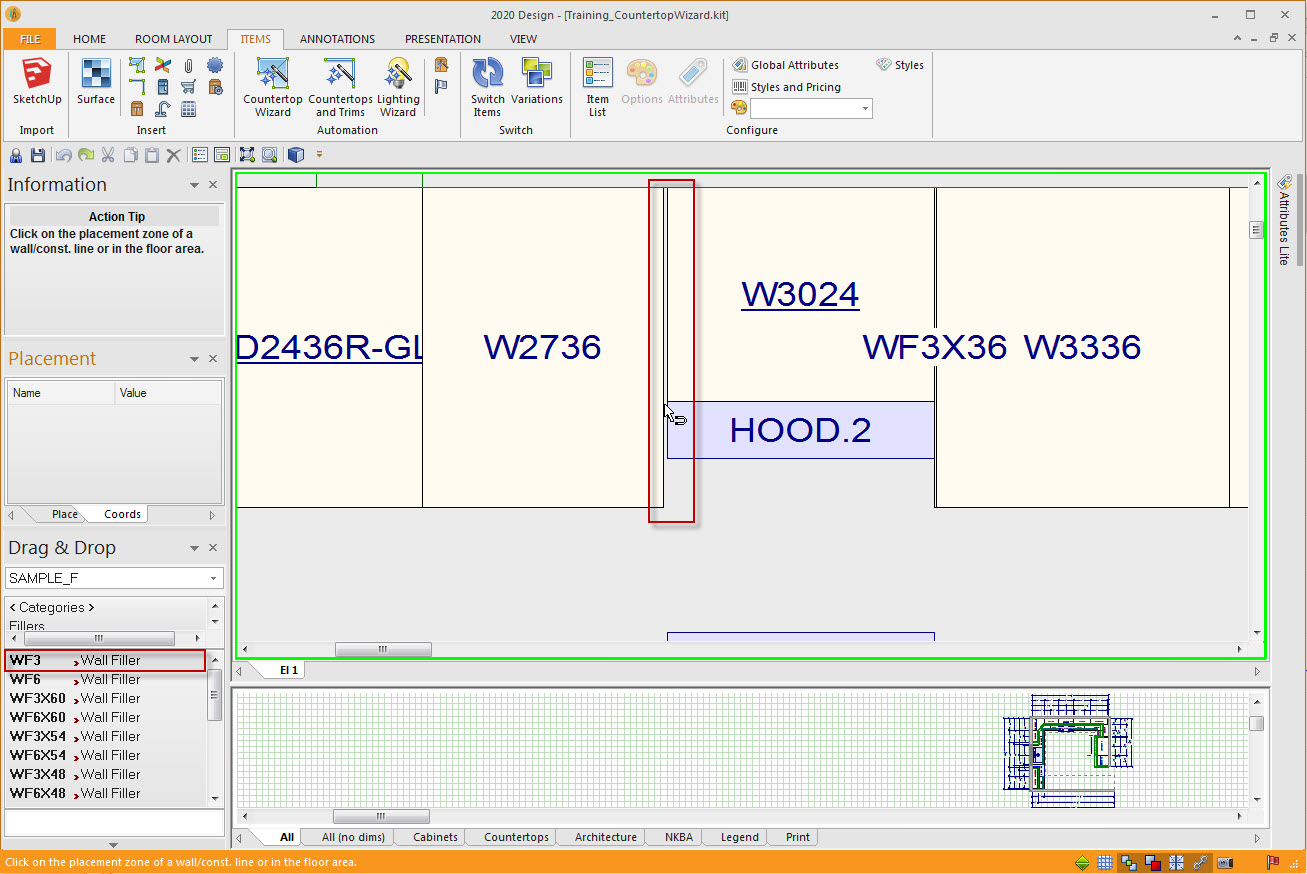
Time: it’s hard to imagine anything that is more valuable to a K&B professional. One of my favorite ways to save time is by using the elevation feature to place fillers in corners. Try it … you will love it. First place your cabinets in the plan except the fillers. Then double click on the work space of the wall where you want to place the filler. Now drag the filler to the elevation and drop it where you need it. It snaps in and will automatically trim to fit. Between cabinets, in the corner against the left or the right wall … it doesn’t matter. Your filler snaps into place and auto-sizes in a jiffy.
This is one of my favorite time savers, what is one of yours?

What is your favorite 3D SketchUp Shape to use in 2020 Design?
Importing 3D SketchUp shapes can bring realism and connection for your client. And when working outside of the Kitchen or bathroom, it elevates your ability to deliver true interior design concepts to your client. I import everything from kitchen chairs to 3D people to Crate & Barrel products to Starbucks coffee cups.
Share with the community some of your favorite shapes.
I’ve created a few custom reports from Worksheet that have worked for our proposals so far. But now we are looking for a higher level of customization in the proposals we generate.
Any good resources for accomplishing this? Any software that works well alongside Worksheet to generate a detailed highly customizable proposal form?
Basically we are wanting to do a summary proposal for the client – template driven so that instead of every piece and part of a workstation being priced out, we can roll it up to a PRICE PER WORKSTATION type proposal.
Just now starting to research myself. Any tips or direction would be great.
Britt Alexander
Sr. Project Manager
Topic: How to find catalogs
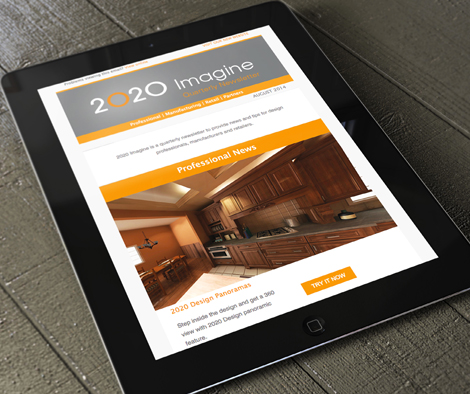
2020 Imagine is a quarterly newsletter to provide news and tips for design professionals, manufacturers and retailers.
Read the December 2014 here : https://www.2020spaces.com/2020-imagine-december-2014/
Topic: How to use the forum
Looking for help, but not sure where to go?
The 2020 user community is a place to share thoughts, ideas, tips, tricks and solutions with your peers. Registered users can post questions and answer or comment but if you get really stuck remember there’s always your local support office available to call for help. If you’re a 2020 Design user with an expired maintenance & support contract, get in touch and we’ll help you renew.
Please be sure to abide by the standard practices of posting in public forums & refrain from using derogatory, inflammatory or unsavoury remarks.