Search Results for 'tips'

  • Ariana Thompson
    Participant

    So I’ve been testing – any tips for making the Door and the Drawer on a unit different SIZES? or different STYLES?

    Say a 128mm on the door and a 160mm on the drawer of the same cabinet – or a matte black knob from one line, and a matte black pull from a different line?

    It seems to only “register” what I choose for the doors – and just applies it to both.

    Cheers,

    Ariana

    Ariana Thompson
    Participant

    Hi All!

    Love Hickory Hardware and I’ve just installed the newest zipfile – but I can’t make it work!

    Any tips?

    Cheers,

    Ariana


    Topic: Stacking Crown Moldings

    February 10, 2022 at 10:31 pm #358779
    Melina Murphy
    Participant

    Has anyone had success in stacking top moldings? It’s supposed to work by dragging and dropping on top of the first molding, but I’ve had zero success with V13 doing this.

    The only way I can stack is by using a running line, but it doesn’t always look great for some reason.


    Any tips are appreciated!

    Topic: Wire Mesh inserts in cabinets

    October 19, 2021 at 9:24 am #348957
    Erin Port
    Participant

    Hello, looking for a cabinet sample that has the ability to change the cabinet to have a wire mesh inserted in the panel.  To save me lots of hours of searching, anyone know of one, or a way to manipulate a cabinet to have one?

    New to this program and would appreciate any tips.

    Thank you!

    Erin Port

    In reply to: Lighting Catalog

    September 9, 2021 at 12:01 pm #345424
    Kristopher Papaleo
    Participant

    Hi Jeremy,

    HERE is an article on how to use the lighting effects in the program.

    HERE is an article on where to find lighting fixtures in the program.

    When using the recessed spot lighting from the ROOM_FUR catalog, you can manipulate the amount of light that the fixture produces and the color of the light that the fixture produces. Add a SPOT.RECESSED to your design and right click on it and go to Light Properties. From here you can change the color that the fixture produces. Once you do that, you can then go to the fixtures attributes and variables. In Variables, you can change the lights intensity and open the Lights Opening (the higher the number, the further the light will be distributed). HERE is a video to also demonstrate this

    HERE is an article to show you how to manipulate the lighting coming from your windows.

    You can also download and install the Lighting Wizard to test it out and see if it to your liking. You can find the lighting wizard on either 2020spaces.com or 2020.net. From these two locations, you can also find Task Lighting.

    HERE is an article on how to activate the Lighting Wizard.

    HERE and HERE are other articles related to the Lighting Wizard.

    Hope all this helps!

    Kris

    Topic: Lighting Catalog

    September 9, 2021 at 9:19 am #345281
    Jeremy Pyatt
    Participant

    What is the best lighting catalog to use?  I am using Redway3d engine and the lighting looks terrible.  Any tips?  Sun, Scene, Image or Ceiling light?

    I was hoping there was a catalog with different pots, pendants exc.


    Attachments:
    Amy Truchan
    2020 Moderator

    Thursday, September 2, 2021, at 2 PM EST

    No question is too big or too small! 2020 Design Live v13 is the newest version of our kitchen and bathroom design application and we want to answer your questions about all the latest features and functionalities we have added. In a live 60-minute session, the top questions you all want to know about will be addressed. We will also throw in a few tips on how to make the most of 2020 Design Live v13. It is a can’t-miss event!

    Register Now

    In reply to: WishList

    June 10, 2021 at 4:33 pm #335806
    Ariana Thompson
    Participant

    Hi Willesa,

    All done – and both excellent tips.  Though I do like a bright, sunny room.  While I ADORE the renderings I see some gifted folks do with 2020, I do find most too dark for my taste.  I want my renders to look like a design magazine – and they’re bright!

    This photo for example – I had to dial down all the windows to almost black, and dim the ambient light to the point where – while usable – I do not like how dark this render is. All so the glass in those uppers weren’t blinding white with reflection.


    Attachments:

    In reply to: Blog Roundup August 2018

    May 24, 2021 at 6:22 am #331668
    Clover Elmers
    Participant

    I read the article about social media marketing tips and I totally agree that you should always post relevant content. I’m an artist and I have my own blog with paintings, and before I posted only my works there. But then I realized that there are a lot of artists among my audience, and I started posting tutorials and reviews. And people like that. Recently I’ve looked through many articles with drawing ideas like this one https://artistro.com/blogs/news/diy-painted-mugs-master-class and realized that it’s cool idea too.
    Designers can also write about ideas on how exactly to implement the design of some part of the room or ideas of some separate elements. For example, how to  organize a small space ergonomically or something like that

    Scott Diamond
    Participant

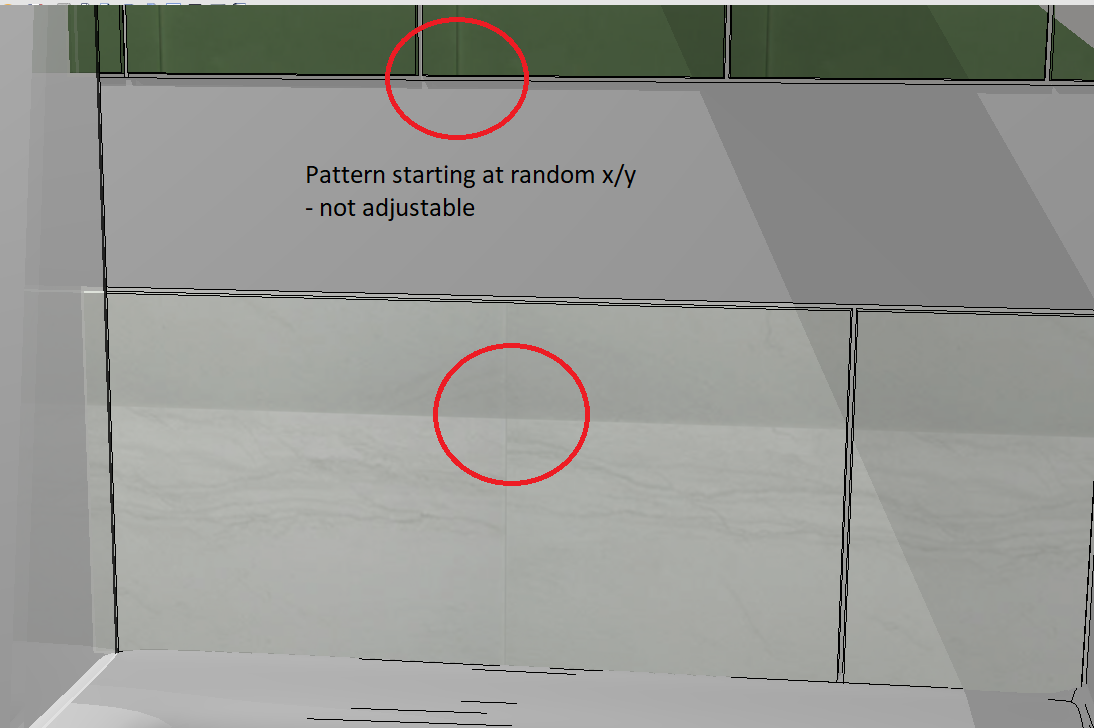
    Hello! i have been using 2020 for a few years now and I just don’t understand how the tile features is even close to being usable, and it seems to have just been getting worse. I do a far amount of bathroom and Kitchen designs, and I use some large 12×24 / 24×48 form factor with carrara or marbling veining tiles and I can never get the pattern to exist without rolling over or splicing halfway in the tile. Is there a way to adjust where the pattern starts and stops? I had kind given up and moved over to using Surfaces to “tile” an area but even that seems to no longer work, as the “origin” of the pattern is not alined to what has bene drawn. While I’m ranting on, Why is there not an easy way to to 50/50 stacks of subway? If anyone has any tips to help out, that be great because I am just very frustrated at this program that just seems very half supported at times.

    Attachments:

    Topic: Custom Material Wizard V12.4

    May 7, 2021 at 4:00 pm #328870
    Katya Garcia
    Participant

    Hi all, I have some experience with 2020 and I’m trying to get better at it. I have been watching how-to videos including how to add custom materials, for example backsplash.

    This video ( https://learning.2020spaces.com/design-us/learn/course/18/play/150/placing-custom-textures ) shows a wizard within the program that allows you to crop the image however I never receive this prompt. I know I have a newer version so that could be why. I usually have to go back and forth between MS Paint and 2020 to get it properly cropped.

    Is there something I should be doing in settings or installing to get this feature?


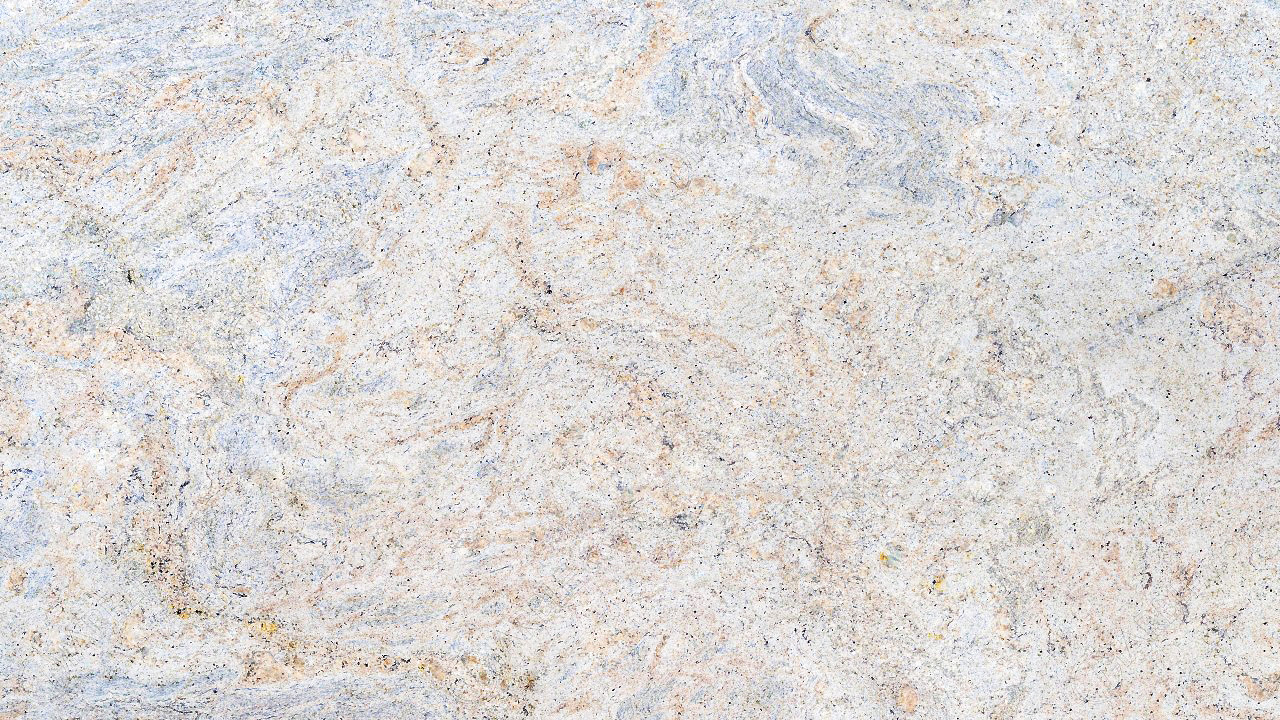
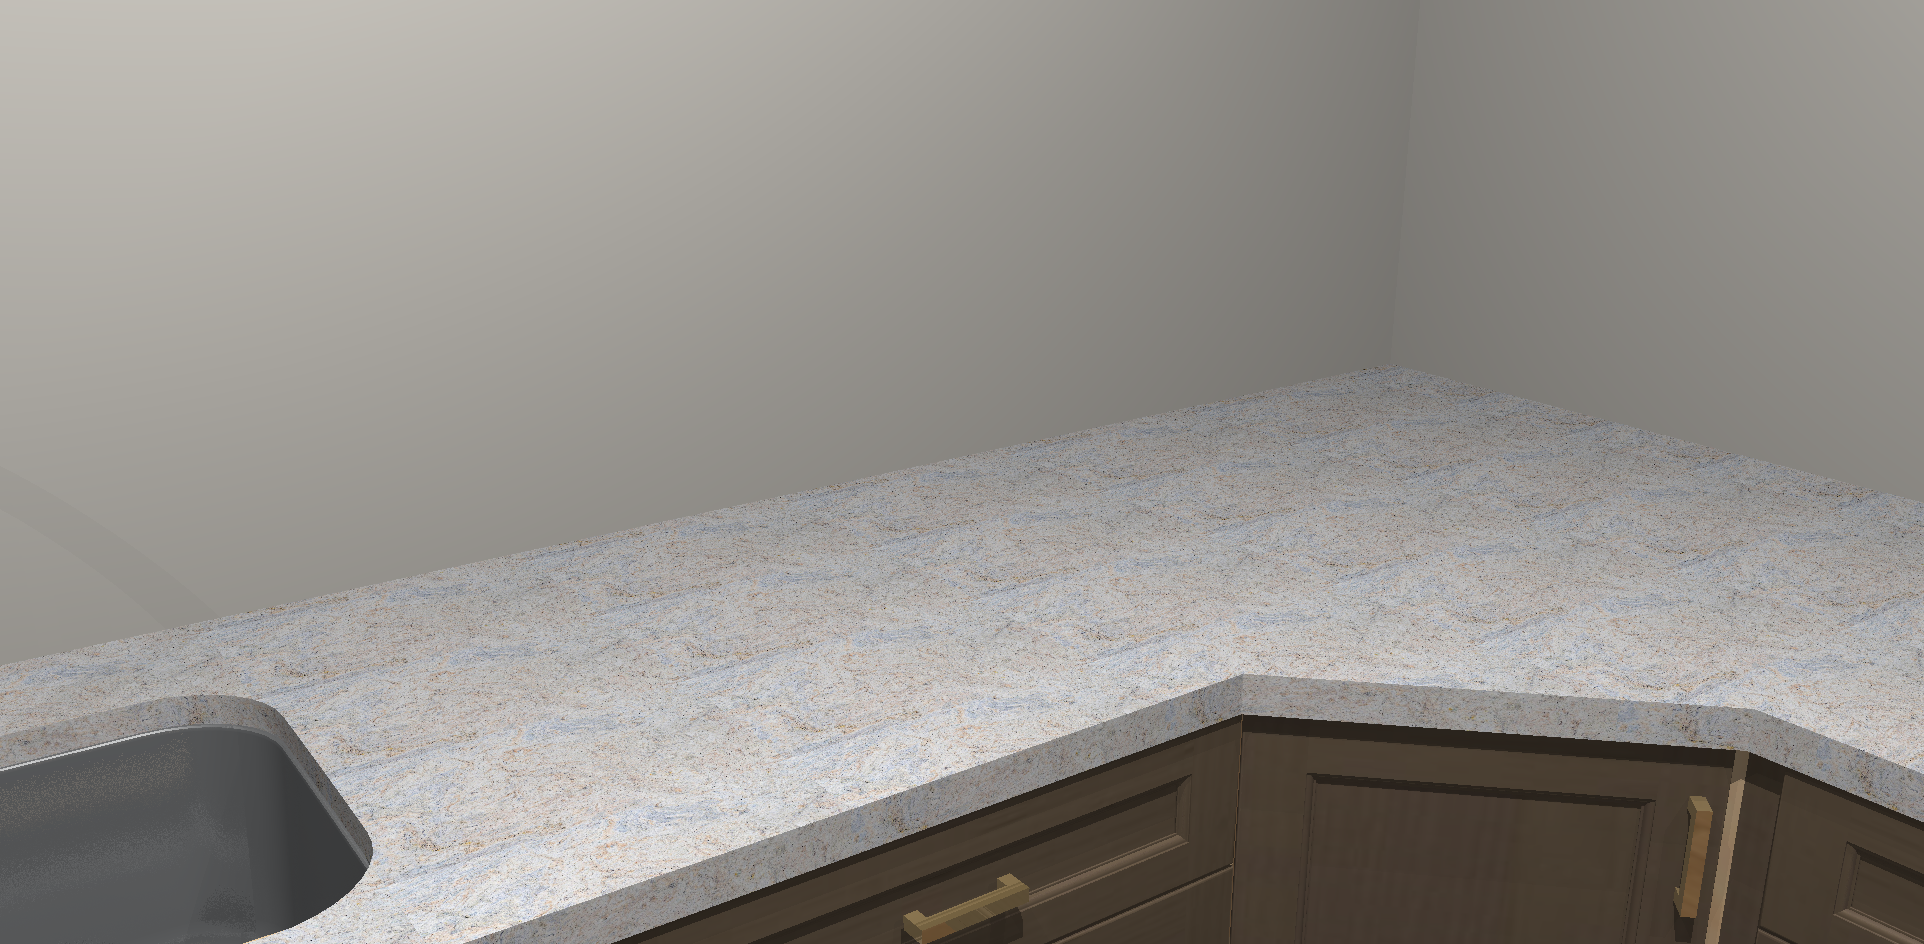
    I also have tried adding slabs but the outcome is a shrunken slab photo shown as a repeating pattern. Any tips?


    In reply to: Infinite floor and ceiling

    April 20, 2021 at 12:44 pm #324424
    Daniel Serrano
    Participant

    Thanks for the tips, Kristopher,

    I checked what you told me, but all walls are set to the same height and there aren’t construction lines on my design. Maybe it’s residual information from other walls and construction lines that I created an then deleted in the same file prior to the current design.

    I’ll first try redoing the project in a new file to see if it happens again. If the issue persist I’ll ask the support agents.

    In reply to: Background Images

    March 2, 2021 at 12:26 pm #318318
    Karen Devlin
    Participant

    Hi thanks very much for the tips, much appreciated!

    In reply to: WishList

    December 31, 2020 at 12:32 pm #312188
    Jennifer Stewart
    Participant

    Thank you so much for the reply.  Yes it is a big change I have only been using 2020 a month.  I am used to Revit to do entire building designs.

    I will try and use your tips today.  Maybe I won’t get so frustrated.

    On the Temporary dimensions  I have attached a couple images from Revit that show what I mean.  It is so simple to move any object any distance with these dimensions.


    In reply to: WishList

    December 31, 2020 at 11:26 am #312184
    Kayla Herrick
    Participant

    Jennifer, I saw your post and thought I’d offer some tips I learned over the years.

    “Is it just me or does anyone else loose work when the walls delete themselves?  I spend more time trying to draw walls then I do the entire kitchen design.  It is so frustrating!”

    I hate when I try to quickly move a cabinet or something and I grab a wall and the whole room moves instead. I found that if you keep your mouse clicked and press ESC, the walls return to it’s original position. If I didn’t do it correctly, the “ctrl z” or undo button is my friend. HOT TIP, limit your undo actions. If you undo too many times, the previous saved actions will refresh to the last auto save. That still catches me off guard.

    One habit I have is to save a file “Client Name Walls” as a back up structure file, then ‘save as’ a new file and start designing. At least this way, if things get jacked, you can copy the interior elements (cabinets, ctops, etc.) into the backup structure file and ‘save as’ again.

    “Why do they have to all be connected?

    There are little buttons in the bottom right hand corner of the yellow status bar. If this bar is blank, right click on the yellow bar and check the Drawing Control. There is a button that looks like a chain link. Turn this OFF! It will allow you to select a single wall versus the entire group. Just make sure the wall you click, you select the red square of the selected wall or the group will still move as one.

    “Why do we have to draw in clockwise direction.  Need to make walls where we can draw them in any order and then select which side the placement zone will be.”

    You can select which way a placement zone faces on a wall by right clicking/double clicking on the wall to open the properties window. In the “Type” tab, there’s a placement zone setting to choose inside, outside, or both.

    “Have the ability to select whether we draw a wall as a chain or just a single wall. ”

    If I only need one wall, you can hit enter twice or right click after entering your dimension.

    “Have the ability, when you click on a wall to have temporary dimensions pop up and walls can be moved by typing in the exact number on the temporary dimension.”

    I think I understand what you’re saying here. If you mean move in a direction (24″ to the left) I use the offset feature. If you don’t have this turned on, do so! You can find it in the “View” tab in the top ribbon. You can offset by clicking the square with the green left arrow to turn it on, type your offset dimension, click the wall/object so it pops up in the center of the placement wheel thing, and click the direction you want it to move. I use offset copy function A LOT for copying can lights 48″ apart.

    If you mean changing the dimension of the wall, open the properties and type the dimension you need. Select the “Lengthen from beginning” or “Lengthen from end” depending on whether the wall is connected to another wall and the wall will grow in the direction you need it to.

    I hope these tips help! Switching to 2020 was a big change for me as well. I’ve been using the program for 10 years, and I still get frustrated by things…